

Old enemies once again engaged in battle. France and Britain were once again at war, and the first land-based clash took place over a small stream that locals call (nomen omen) La Manche.
So I invite you to read the battle report from the battle on its shores 🙂
Wojtek was my opponent this time. Our armies counted $ 1,500 (game points, to see more visit our army builder: http://www.gmboardgames.com/ab/index.php), and we played the battle at Bolter.pl, where a cyclical event is held on Sunday, called: “Dice Warming Wars” where you can come and play any game.
Of the two available French armies, I chose the Army of the Orient. Its weaknesses are the lack of a cavalry corps (only independent divisions), which I really like to play, and the lack of La Hitte rifled cannons, so it is necessary to rely on the smaller range “Napoleon” guns, mountain artillery or naval cannons.
The challenge for the French is also that – as cavalry tactics – they cannot choose “army cover”, which means that usually the enemy will be the first to capture at least two strategic points. You can read how I tried to deal with this challenge in the photo descriptions below.
My Army of the Orient consisted of 1 large infantry corps (as many as 9 infantry regiments, including Zouaves and the French Foreign Legion), an independent light cavalry division (2x hussars), an independent heavy cavalry division (2x cuirassiers) and army’s reserve artillery with naval guns (3 batteries ). The commander-in-chief of my army was Saint Arnaud, the infantry corps was commanded by Canrobert, and the army’s reserve artillery was commanded by Forgeot.
The British army was assembled in a completely different way. It had two more or less equal corps. The first – a bit stronger, was commanded by J.H. Grant, the second by Pennefather, an independent cavalry division by Paget, and the army’s reserve artillery by Dacres. The commander-in-chief was the Duke of Cambridge. Wojtek played the Main Army, which simulated the British army at the turn of the 1850s and 1860s, so he had some technological advantage (rifled muskets, breachloading rifled artillery – Armstrong guns). However, this is offset by the army’s higher point cost.
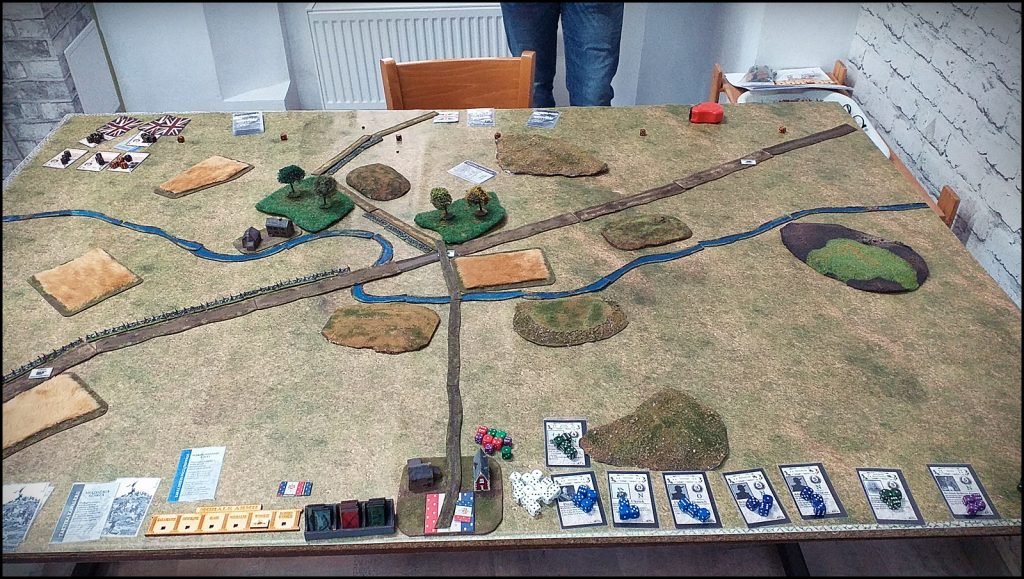
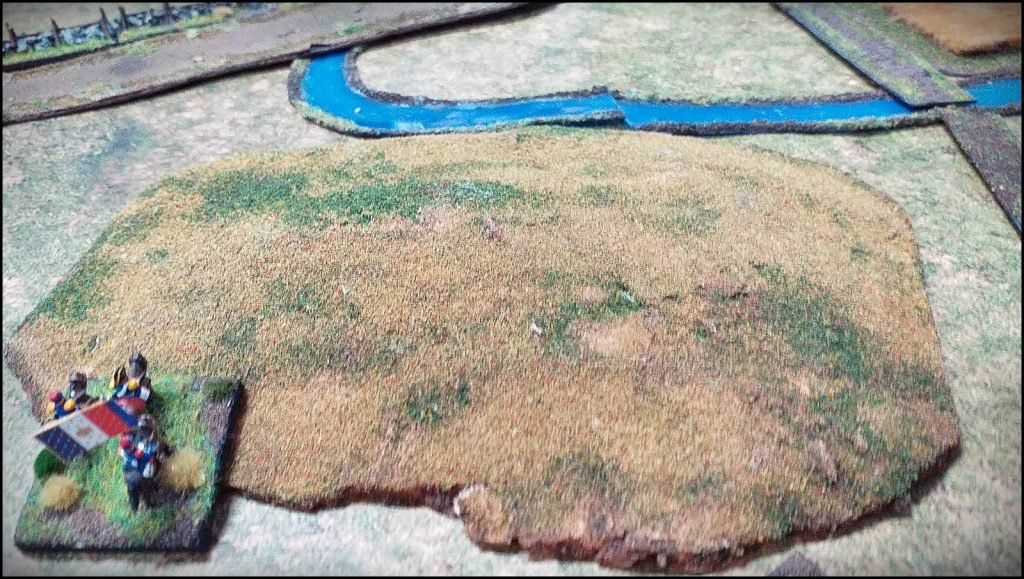
We started to place the terrain. I won the initiative, so we were setting up terrain for the Army of the Orient, which meant a lot of hills (great for artillery), some forests and fields. Wojtek put up a stream (La Manche stream), providing cover to the central strategic point, I set up a diagonal road connecting all 3 strategic points and making it easier to cross the stream. Then each of us added one more road leading to the central strategic point. We started to place the remaining terrain. My main goal was to place a hill that would allow for a good positioning of my army reserve artillery, which has as much as 24 inch range, and at the same time conceal the approach to the mid strategic point, preferably by placing the forest. It worked (visible in the first photo, a bit below).
When I was about to choose my army’s tactics, I decided first of all to give up defending my base of operations. This, coupled with the army roster, made offensive tactics the obvious choice (one of the goals of defensive tactics is to defend the base of operations. I wanted to avoid that). I was hoping to get my opponent’s operational base, deal him 25% losses and get 2 strategic points, which would be enough to win.
The main French corps was supposed to attack one of the opponent’s corps, I was hoping that he would have at least two corps, it would be a dream if they were separated (I could win by “defeat in detail). Regarding cavalry tactics, I chose “crushing charge”, which gives you extra victory points for each enemy unit destroyed by my heavy cavalry.
As predicted, Wojtek chose the “army cover” cavalry tactic and placed the patrol marker at a strategic point in the middle at the very beginning of the battle.


Effective shelling routed British artillery, but unfortunately did not destroy it. They were able to regain cohesion, and took position at the hill, behind the corps.

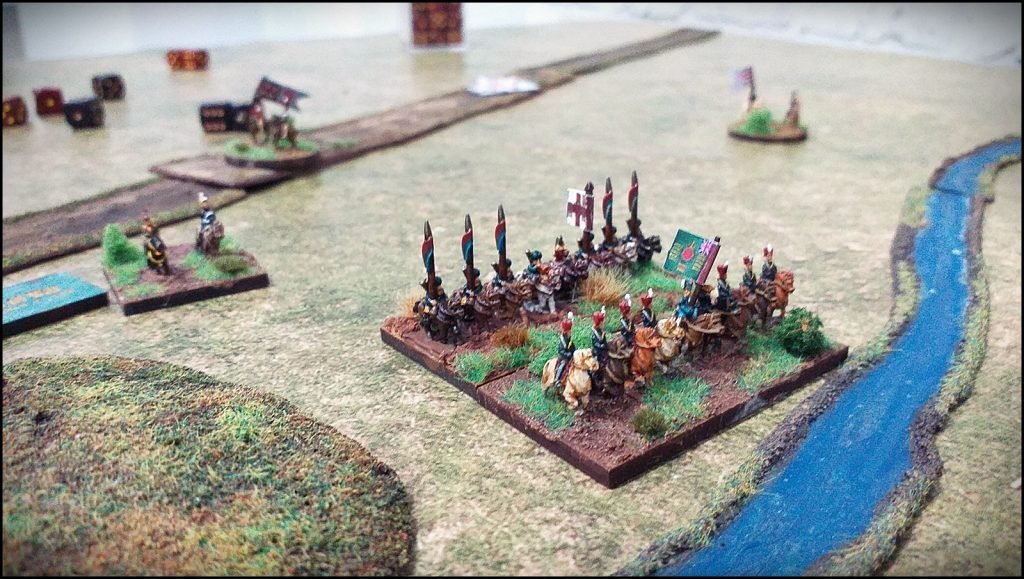


The pursuit of the Yeomanry also had a different effect – it revealed the second British Corps between the hills (will appear in the next photo below).
The lancers themselves will soon be destroyed by the fire of my naval artillery – they put their backs to me, weakened, to fire from the hill (re-roll of failed hits …). It couldn’t have ended well for them …

I love heavy cavalry, although playing them is quite a lottery – it is difficult to withstand infantry fire (rifled muskets!), but when a flank attack is successful …

Hopefully now – with this example – you understand better how important it is to plan your battle right at the stage of setting up the terrain? Of course, a battle brings many surprises 🙂

In Gods of War: Lee, corps generals don’t always do what the commander-in-chief plans. They have their own characters and sometimes make decisions according to their conscience. And you, Player, as Commander in Chief, you have to deal with it.
Canrobert failed the Order check (1 success out of 6 dice used!), And due to his special trait, I had to throw a dice to determine whether he would behave like a general cautious or aggressive. It came out first (cautious) – the worst that could have been! The Canrobert retreated most of the units to the other side of the stream – exactly the opposite of what I wanted to do! Apparently, the general decided that he must remain in contact with the center of the army …
Merde!


A crisis in battle.

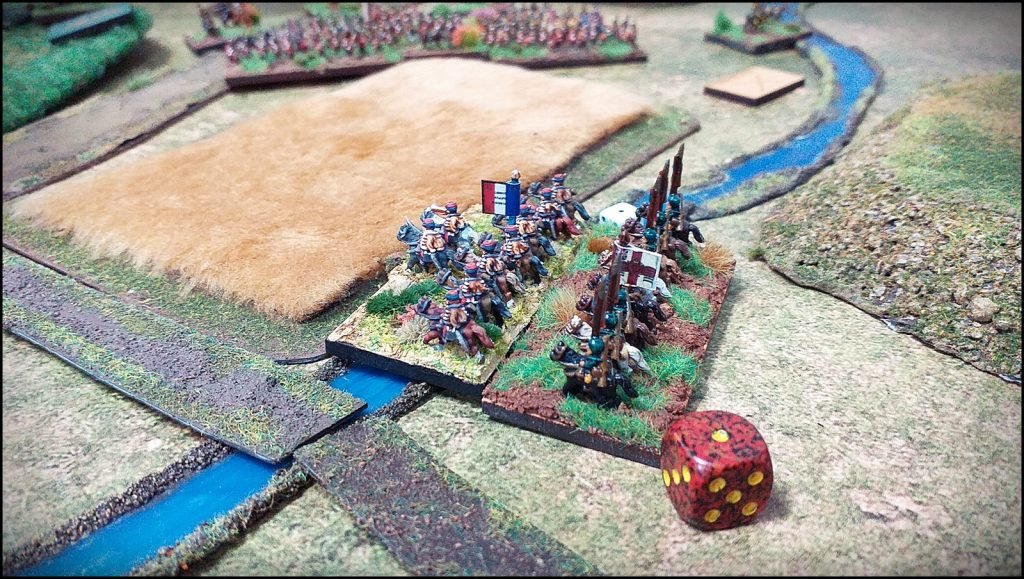
PS. It is worth paying attention to the position of the British infantry shown in the photo: the brigade at the top has no support unit at the rear. This meant that if I also attacked the brigade that supported her from the flank (the one in the middle of the British formation), it would not be able to extend the line to prevent a possible outflanking. However, positioning this brigade at the rear would mean that it would stand on a hill and obstruct the view of artillery that would have to move and would either hide behind and be unable to support fire, or position it further north, exposed to attack by my infantry. These are the interesting dilemmas of arranging units in the formation in “Lee” the generals have 🙂
Meanwhile, my corps was gathered in the forest, except for the 3rd Division (at the very top), which had the longest distance to go.

(The regiment and brigade in the game are interchangeable terms – depending on the organization in different armies. For example, the French regiment had about 2,000 soldiers, and the Union or Confederate brigade had an average of 1,500. One base in the game usually consists of 1,500-2,000 soldiers).
At the head of the corps, we see the French Foreign Legion and Zouaves.


Wojtek did not decide on a counterattack that would distance him from Grant’s corps and the strategic point.

I opted for the first solution. It was still a long way to the British operational base, and it was not certain that it would be captured in one move. So I counted on the fact that I would be able to inflict the greatest possible losses on Wojtek – it could lead to a breakdown in the morale of his army and thus gain more victory points.
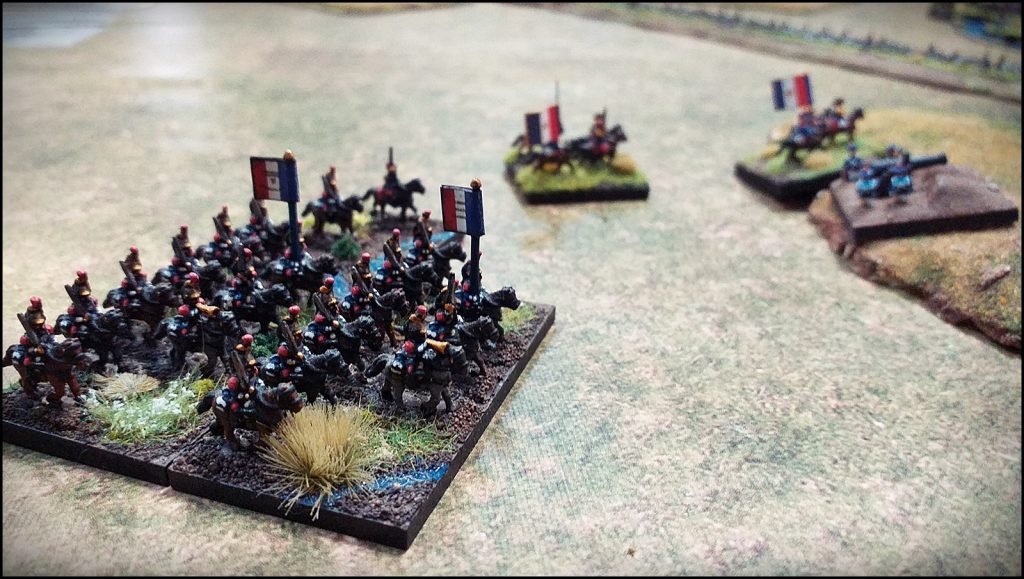
So the corps made an attack. French Foreign Legion and Zouaves led the attack and completely destroyed the remaining units of Grant’s corps. Whats left in this area was only the army reserve artillery and corps artillery on a hill. One of my regiments tried an unsuccessful attack on them. Well, maybe not entirely unsuccessful, because he did not allow her to support his infantry (fighting with FFL and Zouaves) with fire. Unfortunately, Pennefather’s corps artillery finished off one of my regiments with fire (the one that had fought infantry in pith helmets), which was the only one that was close enough to reach the central strategic point.

From Grant’s corps, only British corps artillery remained (plus the army reserve artillery standing next to it). The morale of Wojtek’s army has dropped to shaky – the one level from collapse.
Merde! – I could have said, had it not been for the fact that we had a great game and we were both in very good moods.
At the end of the battle, we were able to reveal our army tactics, which define the objectives to be completed and for which you get the most points.
Wojtek had a defensive tactic. He accomplished two goals out of it – he kept his own operational base and kept at least two strategic points (the middle one and the one on the top right). It meant getting 50% of the point value of his army (if he had achieved 3 goals – suffered less losses – it would have been 100%). We count points from the remaining units on the battlefield. Wojtek had 6 units left, so he scored … 3 points (50% out of 6 units). On top of that, we added a few points for my units he destroyed and my general who fell during the hussar charge. Plus 1 more point for “card debts” – a special feature of the French: The opponent gets 1 point if I counter his card with my card. Napoleon III liked to use military funds to pay off card debts (his and his friends) …;)
I chose an aggressive tactic and … I achieved only one goal, I destroyed at least 25% of the enemy’s units. It’s not enough to score points (each tactic describes how many goals you need to complete to score points). I did not take over half of the strategic points, I did not take the enemy’s operational base, I did not destroy his morale …
So failure? No. I was saved by the destruction of Grant’s corps, more precisely: points for destroyed units. In addition, 3 points for taking lower losses in battle and 1 point for the “crushing charge” cavalry tactic – the cuirassiers destroyed VRC.
After the count, it turned out that I had 4 points advantage, which meant a minimal victory (almost a draw …).
I hope that with this battle report we have introduced not only the gameplay of “Lee”, but also the tactical dilemmas that you face as the commander-in-chief of the entire army.
Good luck in your battles!
PS. We are working od DTP of the English version of the rulebook for Gods of War: Lee, so its release is close 🙂